Project 2: Barrel Bouncer VR Edition
Part 4: Throwing Balls with Motion Controllers
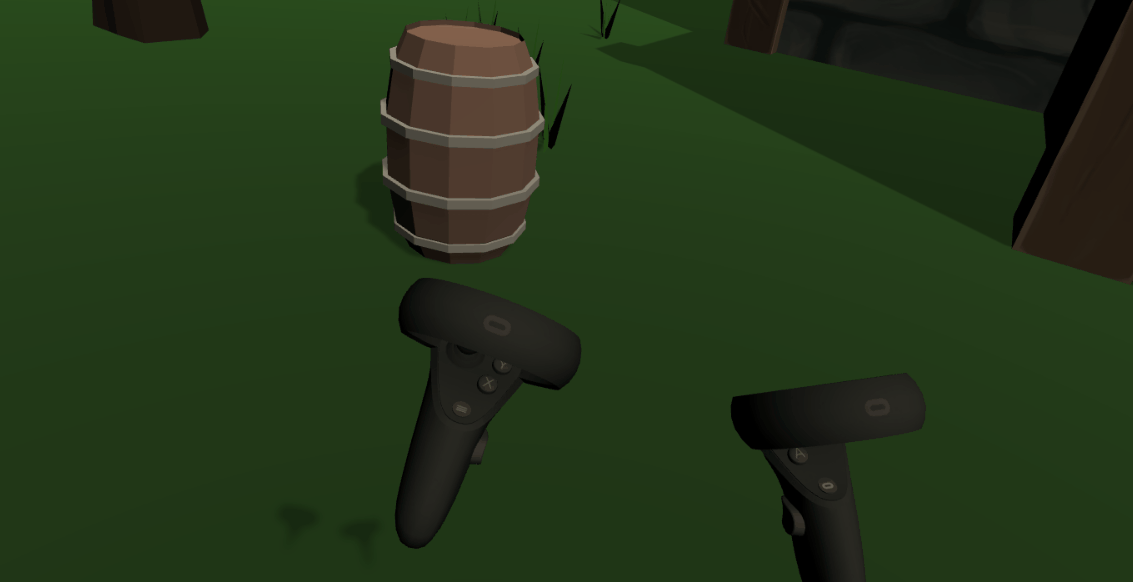
When designing virtual reality experiences, it is important to think about how you can increase immersion. One great way to do this is by using the motion controllers for intuitive hand and arm gestures. These can be a lot more immersive than simply clicking buttons, pressing keys, or moving a mouse. As a result, for this project, you will be using the Oculus Integration’s grabbing system to pick up the balls and then using swinging arm gestures to actually throw the ball, as shown below:
Example Scene
The Oculus Integration actually has two grabbing systems: a regular grabbing system (to pick up objects that your hands/controllers come directly in contact with) and a distance grabbing system (to point at and pick up objects at a distance). Since we want to directly reach into the bucket to pick up the balls, we will be using the former. Unfortunately, the Oculus Sample Framework does not provide a sample scene that shows how to use the regular grabbing system, but it does contain a scene called “DistanceGrab” that shows how to use the distance grabbing system. This scene can be found in the same folder as the other samples (Assets -> Oculus -> SampleFramework -> Usage). It may still be useful for you to reference this scene as you work on this section as it contains a somewhat similar setup and set of properties with its associated components. The documentation that explains how the scene works can be found here.
Configuring the Controllers as “Grabbers”
The Oculus Integration allows you to designate certain GameObjects as “grabbers”, which are then allowed to grab certain “grabbable” GameObjects. Since the user should be able to pick things up with the touch controllers, you should apply the following changes to both the left and right instances of the OVRControllerPrefab in your scene:
- Add a Sphere Collider with a radius of 0.1 meters, since this is roughly is roughly the size of the model of the Oculus Touch controller. The Oculus Integration’s grabbing system relies on Unity’s physics system to detect if grabber and grabbable objects are in contact with each other, and thus you need colliders on both types of GameObjects.
- Make the collider a trigger, so that 1) the motion of the model accurately follows the real controller movements and is not restricted or messed up by collisions, and 2) you can actually move your controller into the ball without pushing it away.
- Add the OVR Grabber script that is provided by the Oculus Integration. Note that this will also automatically attach a Rigidbody, which the script depends upon.
- Set the Rigidbody to not use gravity so that the controller models don’t automatically fall to the floor.
- Assign the correct values for the OVR Grabber’s correct component properties and references, as listed below:
- Set the Parent Held Object property to true. This will make the grabbed object a child of the grabber when it is picked up, thus allowing it to follow the movements of the controller. It will also automatically set the object’s parent to be null once you release it, so that its motion is not constrained relative to other GameObjects.
- Assign the Grip Transform to the transform of the instance of the OVRControllerPrefab. This defines the position to move the grabbable object to once it has been grabbed. In other words, when a ball is grabbed, it will be moved to the same location as the OVRControllerPrefab GameObject at that point in time.
- The Grab Volumes define the colliders that should be used by the grabber to detect if it has collided with any grabbable GameObjects. Increase the array size to 1 and set it to the sphere collider of the instance of the OVRControllerPrefab that you added above in step 1.
- Select either “L Touch” or “R Touch” for the Controller type, depending on which controller you are currently dealing with.
Note that you do not need to set references for any other properties for the reasons listed below:
- If the Parent Transform is not assigned, then the OVR Grabber script automatically assigns this property at runtime to the transform of the parent GameObject of the GameObject it is attached to.
- Assigning the Player reference allows the grabber to set collisions between the grabber’s Grab Volumes and the colliders on the player (and its descendants) to be ignored by the Physics system. However, since our bucket and balls are descendants of our Player (the OVRCameraRig), setting this property would mean that the grabber would not be able to detect when it has collided with the balls and thus won’t be able to pick them up (which is definitely not what we want). Leaving this property unassigned will not have any adverse effects on your scene, since the developers at Oculus appropriately implemented null checks before accessing and working with this reference.
Making the Balls Grabbable
All you need to do make the balls grabbable is add the OVR Grabbable script to them, which is provided by the Oculus Integration. Once you do this, you should be automatically be able to pick up and throw the balls when you build the app. However, we also want you to add some custom functionality based on the grabbing events. Specifically, we want:
- a short haptic vibration on the controller to provide feedback to the user that the ball has been picked up.
- start playing the Woosh sound once the ball is thrown.
- set the ball to be destroyed 5 seconds after it’s been thrown.
As a result, you should NOT have the OVR Grabbable script on your balls but should instead add your own custom script to it that extends the OVRGrabbable class instead of MonoBehaviour. Note that you can still use all the regular Unity events in the scripting lifecycle (like Update, OnCollisionXXX, etc.) since OVRGrabbable is a component after all, which means it does extend MonoBehaviour somewhere up the chain of inheritance. If you already have a script on your balls, you may choose to change the class that it extends from rather than creating a new script from scratch.
The GrabBegin and GrabEnd methods of the OVRGrabbable class are automatically called when the GameObject has just been picked up or been let go of. You can override these methods in order to implement your custom functionalities once they are called. Make sure to call the superclass’s version of the method before adding the additional functionality. Below is an example of the syntax you should use to override the GrabBegin method. To override the GrabEnd method, you should look through the OVRGrabbable class to determine the correct signature to use yourself.
public override void GrabBegin(OVRGrabber hand, Collider grabPoint)
{
    base.GrabBegin(hand, grabPoint);
    // Your custom functionality here.
}
Check out this piece of Oculus Documentation to determine how you can enable vibration. Below are a few things you should keep in mind as you implement the vibration feedback functionality:
- The method you use to achieve this doesn’t account for the duration of the vibration. By default, the vibration last for 2 seconds, which is a bit too long for our purposes of providing a quick feedback. A good way to get around this would be to turn the vibration on, wait for a short period of time (like 0.25 seconds), and then turn the vibration off.
- The haptic feedback should occur on the same controller that was used to pick up the ball (e.g. if the user picks up a ball with their left hand, the left controller should vibrate).
Your code for playing the Woosh sound and setting the ball to be destroyed in 5 seconds can be placed within the GrabEnd method, since that is the start of when your ball has actually been “thrown”. Additionally, if you had set the Rigidbody to be kinematic in Part 2, you should also manually turn that off within the GrabEnd method so that the ball reacts to physics again once it has been thrown.
Retaining Functionality
You are expected to have all the ball-related functionality from project 1 working correctly in this project as well. In addition to playing the the Woosh sound upon throwing and destroying the ball 5 seconds after that, your project should still correctly play the bounce sound when the ball hits the environment and destroy the barrels, play the explode sound, and instantiate the “+1” text upon impact with a barrel.
Bonus Task (Optional)
- The Oculus Quest also supports hand tracking, which allows you to use your hands to engage with and manipulate virtual objects without having to use a controller, as shown in this promo video. Go ahead and modify your project to support hand tracking so that the user can pick up the balls with their hands in the same way they would in real life. Note that you do not need to worry about implementing any of the other functionalities (like teleportation) using hand tracking to get these bonus points. However, your project should have support for both motion controllers and hand tracking. If the user is using controllers, then the OVRControllerPrefab should be shown. If the user is using their hands for interaction, then the OVRHandPrefab should be shown. The Oculus Sample Framework contains an example scene called “HandsInteractionTrainScene” which shows you how to use hand tracking. The documentation for that scene can be found here.